Paint Protection Film (PPF) is an incredible way to keep the outside finish of your vehicle looking new. If you install it for a living or are someone who likes cars and wants to protect their investment, knowing how to apply PPF properly makes all the difference in the world when it comes down to getting great results or not-so-great ones. This blog post offers some useful advice on what steps should be taken during installation, as well as tips and tricks that will help ensure maximum protection from long-term exposure. Follow these guidelines carefully if you want your car paint protected against chips, scratches, and contaminants that may occur over time due to different environmental factors like sun rays or acid rains while making sure its appearance remains flawless for years ahead!
What is paint protection film, and why is it used?

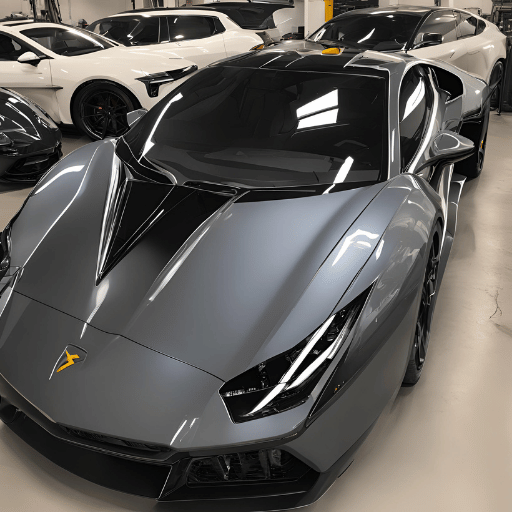
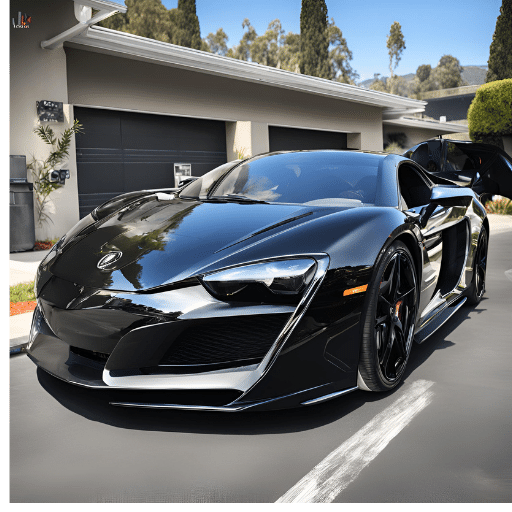
A clear, flexible polyurethane or polymer film called Paint Protection Film (PPF) is applied to the exterior surfaces of a vehicle. It serves as a defense against minor scratches, rock chips, bug remains and ultraviolet rays that could damage the covering of the motorcar. This guarantees that your car maintains its original sparkle and retains its value in case you decide to sell it by preventing paint from fading away and maintaining its initial shine.
Understanding PPF and Its Benefits
Paint Protection Film (PPF) is clear urethane film that gets stuck on the exterior of a vehicle in order to safeguard it against paint damage. It keeps off-road debris, ultraviolet rays, and other environmental contaminants that cause chips, scratches, and stains. PPF has many advantages, which include making the finish last longer, maintaining the initial appearance of the paint, and higher resale value. Ultimately, if you want your car’s paint job to stay looking good while also keeping its structural integrity intact, then there is no better choice than this product!
How PPF Protects the Paint on Your Car
PPF acts as a strong barrier between the paint on your vehicle and other external elements. The film is made of hardy urethane, which absorbs impact from small stones and road debris, hence preventing chips and scratches. PPF also resists UV rays that can lead to oxidization and fading away of the paint over time. Thickness, usually ranging between 6 mils to 10 mils and self-healing properties are some of its technical parameters for effectiveness. These self-repairing features get triggered by heat so that, with time, slight scratches or swirls would vanish. A clear coat layer in PPF improves hydrophobicity, therefore making it easier to clean and maintain the surface of the car that is protected by this film. When all these aspects are combined together, comprehensive protection is provided by PPF while at the same time maintaining the original factory finish of paints.
Comparing PPF to Other Types of Automotive Paint Protection
Comparing Paint Protection Film (PPF) to other automotive paint protectants, such as wax and ceramic coatings, brings about various differentiations. PPF has an impact resistance that is second to none. Its thick, flexible urethane layer guards against physical damages like chips or scratches. In contrast with this, ceramic coatings provide a hard-wearing shield that enhances gloss and offers great hydrophobic properties that repel water, dirt, and chemicals effectively; however, they lack the same level of impact protection offered by PPFs. On the other hand, waxes give some luster while also protecting against environmental contaminants but they are not as durable or long-lasting as either PPFs or ceramics because it need regular reapplication in order for one to keep benefiting from their protective qualities, whereas both these last much longer without losing their effectivenesses at all but have self-healing abilities too. To wrap up, although, every type has its own merits, among them being a self-healing nature, which makes them more complete care products for car paints and thus a better choice than others depending on what you value most in car care products.
What Tools and Materials Do You Need for Paint Protection Film Installation?

Tools
- Pointed knives.
- Rubber scrapers.
- Hot hair blower or hairdryer.
- Atomiser bottle.
- Mops made from fine synthetic fibers.
- Ruler with metric measurements in cm or inches and a tape measure.
Materials List
- Film for paint protection (PPF).
- Application fluid should be prepared by mixing water with infant bath soap meticulously.
- Sealer for edges.
Summary:
The installation of Paint Protection Film involves the use of specific tools like precision knives and squeegees as well as materials such as PPF and an application solution. Proper preparation and correct equipment are vital in producing a quality film.
Essential Tools for PPF Installation
To install Paint Protection Film (PPF) successfully, you need the following:
- Precision knives or blades are used to cut PPF accurately into required shapes and sizes.
- Squeegees help in smoothing out films on surfaces by removing air bubbles.
- A heat gun or hair dryer makes the film more pliant so that it can take compound edges and curves easily.
- The spray bottle is filled with application solution, which serves as a lubricant between the film and the surface being applied during the installation process.
- Microfiber cloths are used to clean dry-off areas before being applied with adhesive-backed clear bra protector sheets against stone chips protection or any other contaminants that might affect their ability to stick firmly onto painted finishes, as well as remove excess solution when finished.
- The measuring tape is used for taking measurements of what needs to be covered up or wrapped completely around an object, such as width, length, height, etc. This helps ensure accuracy during the cutting stage thus avoiding under/over estimation errors while trimming materials meant for PPF fitting purposes.
By having these tools handy, one can guarantee quickens this procedure, hence safeguarding against paintwork damage caused by stone chips along highways where cars often get hit, most frequently robbing them of their luster over time.
Choosing the Right Soap Solution and Installation Gel
To successfully install paint protection film (PPF), it is crucial that you select the right soap solution and installation gel. The mixture for the installation solution is normally made up of water and baby shampoo. Nonetheless, the baby shampoo must not have any additives such as lotions or fragrances which can leave behind residues that might hinder adhesion. Ordinarily, this solution requires one drop of baby shampoo per 32 ounces of water; such accuracy in measurement provides enough lube without compromising on the stickiness of PPF.
Otherwise referred to as an alternative method or supplement to soapy solutions, installation gels allow for more accuracy when adjusting and positioning films because they create thicker layers through which adjustments can be effected easily. When choosing these types of products, ensure that their formulations are specific towards being used with paint protection films, otherwise known as clear bras, so that no harm comes upon either the film side or the vehicle’s painting surface during the application process.
Technical Parameters:
- Ratio for Soap Solution: One Drop Of Baby Shampoo In Thirty-Two Ounces (946 ml) Of Water.
- Baby Shampoo Features: No Additives Used Such As Fragrances Or Lotions.
- Installation Gel Specificity: Made Especially For Ppf Applications Without Harming Car Paints And Films.
Better adhesion, smoother application, and longer-lasting protection on car paints will be achieved if only the correct soap solution together with an appropriate installing gel is employed.
Preparation Tips for Applying Paint Protection Film
A successful application of Paint Protection Film (PPF) demands proper preparation. Here are some of the most important steps to follow:
- Thorough Cleaning: Make sure you clean the surface of the vehicle very well. This should be done by washing the car using a neutral pH automotive shampoo then rinsing it off completely. Use a clay bar or specialized automotive cleaner to remove any tar, sap or other contaminants.
- Drying and Inspection: After cleaning, dry the vehicle thoroughly with microfiber towels to avoid scratching it. Inspect the paint surface for imperfections such as scratches or chips which should be dealt with before applying the film.
- Temperature and Environment Control: Carry out the application indoors at controlled temperatures between 65°F to 75°F (18°C to 24°C). Ensure that there is no dust in air and no wind blowing around as these may introduce contaminants that compromise installation quality.
- Surface Preparation: Wipe down the surface with isopropyl alcohol (IPA) mixture (70% IPA and 30% water) just before applying it in order to get rid of any remaining oils or residues so as to achieve better adhesion by having a clean surface.
- Application Tools and Solutions: Have all necessary tools ready including squeegees, installation gel and soap solution as described earlier on. Create a workstation where all these tools can be easily accessed.
- Test Application: Prior full application, do a small test application to ensure both film and installation process are working correctly. This step will help catch any issues early enough before they become big problems.
The above mentioned preparation steps are vital towards achieving perfect PPF installation that is long lasting while shielding vehicle paintwork from damage hence maintaining its beauty.
How to Prepare Your Vehicle for Paint Protection Film Installation?

To get ready for the installation of Paint Protection Film (PPF) on your vehicle, do the following:
- Complete Cleaning: Cleanse the vehicle thoroughly by eliminating any dirt or dust particles.
- Drying and Checking: Dry off the car and check it for any flaws or damages.
- Temperature and Environment Control: Maintain a temperature-controlled environment between 65°F and 75°F ideally.
- Surface Preparation: Prepare the surface by wiping it down with a 70% IPA solution.
- Application Tools and Solutions: Assemble all necessary tools and solutions for the application.
- Test Application: Try applying a small amount to see how well it sticks before moving onto larger areas/sections/blocks/etc..
Following these steps precisely will lead you through professional-grade PPF installation that will last.
Cleaning and Paint Correction
The installation of Paint Protection Film requires cleaning and paint correction. First, do a thorough wash with a car shampoo that has pH-neutral properties so as not to harm the paint. Then, use a clay bar to get rid of any impurities that may have penetrated. Once it is clean, move on to polish the surface in order to remove all scratches, swirls, or any other blemishes from the paintwork. This stage creates an even flawless finish which is necessary for good film sticking and appearance at large.
Dealing with Existing Paint Damage
To achieve a perfect Paint Protection Film (PPF) installation, it is essential to deal with the existing paint damage. Below are some ways to effectively handle different types of paint damage:
- Eliminating Scratches and Swirls: Dual-action polishers fitted with foam pads and quality polishes can correct minor scratches and swirls. Technical considerations include the hardness of the pad measured in Shore A, where softer pads (50-60 Shore A) are used for light polishing while harder ones (70-80 Shore A) make deeper corrections possible. Polishing speeds should be set at 1,200 – 1,500 RPM for good results.
- Paint Touch-ups: When dealing with deeper scratches or chips that expose the substrate, apply touch-up paint which matches the vehicle’s color code. Give the paint 24 hours to cure before flatting it down and polishing with fine-grit sandpaper like 1500-3000 grit so as to blend with surrounding area.
- Measurement of Paint Thickness: Before and after correction, measure coating thickness using a digital gauge for paint thickness measurement. The ideal thickness required during PPF installation is between 100 – 200 microns; this means if too much material was removed during compounding or sanding, originality might be affected, especially on vehicles having thin factory finishes.
- Restoration of Clear Coat: If there is any damage done to the clear coat, then one may think about applying a clear coat restoration product or even adding another layer of clear coat altogether. Apply in a dust-free environment while keeping temperatures within the range of 60°F to 80°F for optimum outcomes; wait for the curing period directed by the maker, which usually lasts for about 48 – 72 hours.

By doing things right on these points concerning paint damage, you will be able to increase the strength as well the longevity of PPF installation besides improving appearance, thereby safeguarding finish over long periods from cars.
Steps to Ensure a Smooth Paint Surface
- Cleaning in Depth: To remove all dirt, grime and contaminants from the paint surface of a vehicle, start by giving it a thorough wash. This requires using a high-quality car wash soap and a soft microfiber wash mitt to avoid creating new scratches.
- Clay Bar Treatment: Washing alone may not be enough to get rid of all embedded contaminants. After washing, use a clay bar lubricated with plenty of detailing spray or water as needed until you feel resistance when moving the bar across each section. Keep going over every part until it moves freely without sticking or grabbing on any parts.
- Paint Inspection: At this point, switch on different lights around your work area that will help identify defects such as swirl marks, scratches or oxidations that may be present on the vehicle’s surface. Use an inspection light to examine each panel one at a time and mark them out if necessary for focused polish work later on.
- Polishing Process: Look at the severity of paint defects you’ve found so far while selecting your pad/compound combination for polishing steps ahead. Apply polish with DA polisher making sure there is enough overlapping passes made while working in sections but ensure moderate pressure is used too! You can start off with more aggressive compounds if need be then finish finer ones for example.
- Paint Thickness Monitoring: To make sure you don’t damage clear coat excessively, causing future paint failures during the thinning process, regularly measure dry film thickness (DFT) readings across panels being worked electronically using a digital paint gauge tool throughout the polishing stages.
- Final Inspection And Touch Up: Once polishing is done, re-inspect under various lighting conditions, ensuring all defects have been taken care of before applying the last protection product like wax or sealant. This stage also gives room for doing touch-ups where needed, so they are perfect looking once the job is completed all together.
- Surface Protection: Finally apply some good quality wax /sealant which will offer longer life span to freshly polished paints plus it will also shield from contaminations of different types.
Step-by-Step Guide to Apply Paint Protection Film

- Preparation: Clean the car thoroughly by washing and drying it. Do this to remove all pollutants from its surface. Ensure that you have a clean working area that is free from dust.
- Surface Inspection: Once the car is clean, look at the paint surface very keenly for any other faults which may still be there. Correct these before moving on.
- Film Selection: The type of paint protection film (PPF) should be chosen depending on the make, model and specific parts of a vehicle that needs to be safeguarded.
- Cutting the Film: Either use a pre-cut template or manually cut the film according to measurements taken off various sections such as doors or fenders etcetera. This has to be done with utmost care so as not mess up anything in the process.
- Application Solution: Put some drops of baby shampoo into water then shake well creating what we call slip solution contained in spray bottle used for positioning films accurately during their application.
- Film Placement: Spray both surfaces, i.e., the adhesive side of your PPF and the one it’s going onto, ensuring they are evenly wetted but not soaked. Then, line them up correctly before finally sticking them together, firmly pressing outwards, starting from the top towards the bottom, until all air bubbles have been eliminated.
- Squeegee Application: Using a squeegee-like tool made from soft rubber plastic material push down gently or rub hard against flat parts, pushing air bubbles ahead while excess liquid slips out from under thus smoothing everything over time until achieving a smooth, wrinkle-free finish.
- Edge Wrapping: When wrapping edges around panels make sure to follow curves closely without stretching so that the film does not lift nor peel later on due to lack of adherence caused by extreme tension along corners, especially where two different planes meet each other tightly such as wheel arches etcetera also use heat gun set low-temperature help soften materials thus making them more pliable conforming easily even around complex shapes if necessary.
- Final Inspection: Check again for any remaining air bubbles or areas where the film is not sticking well, then use a microfiber cloth with some solution in it to clean the surface of any dust particles before squeegeeing once more over those same spots until satisfied that everything has been done properly this time.
- Curing Time: Leave PPf alone for at least one day (24 hours) without exposing it too much sunlight or water so that the adhesive can set fully guaranteeing better protection against harsh conditions like rain acidic substances etcetera which may try damaging paintwork underneath.
Initial Positioning and Cutting the Film
- Choose the Right PPF: Opt for suitable paint protection film (PPF) that matches with the vehicle’s brand, model and specific parts in need of safeguarding; this guarantees the best coverage.
- Cutting Out the Film: Trim off films by following two methods i.e., using templates which are already cut according to a particular car design or manually cutting them so that they fit precisely onto each panel’s size and shape.
- Mixing Application Solution: In a spray bottle, put water together with some drops of baby shampoo to make slip solution used during positioning film correctly on a surface.
- Placing Films: Spray both sides of adhesive surface as well as vehicle’s exterior body parts before aligning carefully and sticking them onto panels one at a time.
- Align & Position Accurately: Take adequate precautions when aligning positions before applying because it determines how well an area gets covered by film.
Using Soap Solution and Slip Solution for PPF Application
When it comes to applying paint protection film (PPF), soap solution and slip solution are essential for the accuracy and ease of the process. Below is a step-by-step guide and technical parameters on these solutions:
Soap Solution Preparation:
- Ingredients: Combine 95% distilled water with 5% baby shampoo or specialized PPF soap.
- Function: This solution allows the film to slide over the surface of the vehicle more easily, which helps with positioning it correctly and minimizing premature sticking of adhesives.
Slip Solution Preparation:
- Ingredients: Mix water with a small amount of baby shampoo; keep the concentration low.
- Function: Besides assisting in exact placement of films by acting as a lubricant, slip solution also reduces occurrence of air bubbles during application and wrinkles.
Application Process:
- Surface Spraying: Apply generous amounts of well-prepared slip solution onto both sides (adhesive side) of films as well as car surfaces so that there is enough lubrication for smooth sliding.
- Film Adjustment: Place films accurately onto vehicle panels. The lubricated area can be shifted without interfering with stickiness properties thus making it easy for proper alignment.
- Securing Films: Remove excess solution using squeegee while firmly fixing them into position. Start from middle part going outwards to eliminate any trapped air pockets thereby ensuring even adhesion across whole panel.
With these solutions, you will improve your application process making it easier and effective too. Proper mixing ratios together with application techniques guarantees longer lasting durability as well better protecting paintwork on your vehicle.
Pull and Stretch the Film to Fit Curves
One of the most important steps in applying PPF (Paint Protection Film) is stretching and pulling the film to fit curves. This is particularly necessary for places with compound contours like bumpers or side mirrors. Here are some detailed instructions to follow in order to achieve perfect installation:
- Film Pre-Heating: Slightly warm up the film using a heat gun; it will make it more flexible so that you can easily shape it around corners without getting creases or air pockets.
- Stretching Technique: Fasten one end of the film onto an area with no curves. Then, gently pull and stretch it over each curved section while maintaining equal tension throughout not to overstretch.
- Alignment and Adjustment: Regularly verify if the film aligns with the vehicle’s curvatures accurately. Employ slip solution for minor tweaks where necessary as this keeps the film from settling down.
- Final Fixation: Settle down all remaining solutions beneath by moving squeegee towards edges starting from middle once you have positioned the wrap properly.Apply additional heat if required so that wraps stick closely on these bends.
When we stretch a painting, covering, or any other type of film along its curves, it rightly gives a seamless look that appears as if were part of the original design made by the manufacturer themselves for cars.
Common Issues in PPF Installation and How to Solve Them

Air Bubbles:
- Solution: Apply more heat if required, and squeegee them out to the sides.
Wrinkles:
- Solution: Gently lift it up, apply an amount of hotness that will be adequate for it, then stretch it again so as to make ridges get flattened.
Misalignment:
- Solution: Lift the film; put slip solution on it again and do this gently.
Edge Lifting:
- Solution: Extra heat should be applied at the edges before pressing hard on them to make them stick well.
Contamination Under Film:
- Solution: Take off the film, clean well and reposition it.
Film Tearing:
- Solution: Replace torn sections using a new piece, ensuring uniform stretching so as to prevent further tears.
Preventing and Fixing Air Bubbles
To avoid air bubbles while applying PPF, a person must be very careful. The process begins by cleaning the surface thoroughly and ensuring that it is free from any loose materials before the application of the film. Use more slip solutions than required to allow easy movement or flexibility of the film so that it can be repositioned whenever necessary. Apply uniformly increasing pressure with a squeegee starting from middle towards edges in one stroke after another without leaving any parts untouched to get rid of trapped air beneath it as you push outwards in all directions during installation. Make sure every stroke overlaps another slightly; this reduces the chances of getting bubbles because uniform pressure will have been applied across the entire area covered by these strokes, thus eliminating air pockets between layers, which may cause blistering later on when exposed to sunlight or heat. If there are still some small visible bubbles left behind after pushing them all out with a squeegee again, then apply more heat onto such areas using a gun until they disappear completely; otherwise, use your own suitable method but always ensure that no single bubble remains on the top surface at the end .
Handling Misalignment and Adjustments
Misalignment can occur during paint protection film (PPF) installation, but it can be fixed by making careful adjustments and using the right materials. The steps to deal with misalignment are as follows:
Detection:
- Parameters: Visually inspect the edges and alignment in relation to the contours of the surface to determine how far the misalignment has gone.
- Justification: Proper identification of misalignment ensures accurate realignment and prevents wasted material.
Lifting the Film:
- Parameters: Utilize a slip solution when lifting PPF that is out of place so as not to stretch or create permanent creases on it.
- Justification: Applying a slip solution temporarily reduces adhesive strength thereby allowing for easy repositioning.
Reapplying Slip Solution:
- Parameters: Apply an appropriate amount of slip solution again both on the surface and adhesive side of the film.
- Justification: It keeps the film mobile and flexible enough for correct realignment.
Realignment:
- Parameters: Shift the film carefully until it gets back into place. Use visual aids or markings if necessary for accuracy purposes while doing this step.
- Justification: Accurate realignment helps in maintaining the overall protective functionality as well as the aesthetic appeal of PPFs.
Securing Edges:
- Parameters: Use a squeegee to reapply firm even pressure, which secures films firmly at their edges, starting from the center towards the outside part(s).
- Justification: Strong adhesion is achieved thus preventing future lifting or misalignment in this way.
Removing Excess Slip Solution:
- Parameters: Get rid of all unnecessary slip solutions by wiping them up using clean, dry microfiber cloths only, please!
- Justification: Do away with residues that could affect adhesiveness besides leaving behind neat finishes. Always remember!!
By following these steps and paying attention to technicalities, you will easily correct an improperly aligned item, hence ensuring professional-grade PPF installations.
Dealing with Stretch Marks and Excess Film
Identifying and Dealing with Stretch Marks:
- Parameters: These marks come about when the film is pulled too tightly during installation, causing it to wrinkle visibly.
- Resolution: Warm up the affected region softly using a heat gun so as to let the film slacken. When it becomes malleable, employ a squeegee in smoothing out these lines of stretch.
- Justification: Heating calms down tension in films while smoothening ensures an even look without damaging them.
Trimming Extra Film:
- Parameters: Find those sections that exceed desired margins.
- Resolution: Take a sharp utility knife and carefully cut away any extra material around curves or edges where precision is needed for fitting purposes.
- Justification: Trimming eliminates lifting up of surplus films that may gather dirt thereby maintaining cleanliness and professionalism.
Securing Trimmed Edges:
- Parameters: Assess the edges after trimming to confirm full adhesion.
- Resolution: Apply pressure on these areas by firmly running a squeegee over them; however, if need be, use heat guns which will help in keeping them intact.
- Justification: Firmly sticking down edge parts prevents future peeling-off events, thus enhancing the durability of movies.
By dealing with stretch marks systematically and cutting off excess coverings skillfully, an installer can achieve professional finish as well as functionality for protective installations.
Can You Install Paint Protection Film Yourself, or Should You Hire a Professional?

Is it possible to put paint protection film on your car yourself?
- Answer: Yes, you can put paint protection film on your car by yourself, but you have to be very precise and skillful, also, you need some specific tools.
Do You Need a Professional?
- Answer: Therefore It is recommended that you should hire an expert so that they can do the job perfectly without any mistake which could have been caused if done personally or even worse than expected.
Summary: In order not to mess up with anything during the application process and have everything done correctly as it should be without causing damages either accidentally or intentionally, it is better to engage a specialist in this area of installing PPF onto cars.
Advantages of Professional PPF Installation
Expertise and Experience:
- Professionals are trained and have adequate practice in putting the paint protective film (PPF).
- Benefit: Their knowledge ensures good results by reducing mistakes and imperfections.
Specialized Tools and Equipment:
- Professional installers have tools that are specially made for installing PPF.
- Benefit: This leads to a smoother finish which lasts longer compared to doing it yourself methods.
Warranty Coverage:
- Most professional services provide warranties on their work as well as the product used.
- Benefit: It guarantees peace of mind because you know any problem will be fixed without extra charges.
Time Efficiency:
- A person who installs this material for a living can do it faster than an inexperienced individual would take.
- Benefit: Saves time and reduces inconveniences associated with your car being off the road for too long.
Enhanced Longevity and Performance:
- If done correctly, this layer will work better and last longer, which can only be achieved through proper installation by skilled personnel hence, professionalism has its own merits.
- Benefit: Maximizes protection hence safeguarding your vehicle’s paint for many years after application.
DIY PPF Installation Tips for Enthusiasts
Preparation and Planning:
- Explanation: In order to do a DIY PPF installation successfully, it is important to plan well and make adequate preparations.
Tips:
- Explanation: Using the right tools will enable you to apply the film smoothly and with high quality finish.
Tools Required:
- Explanation: The most important part of this process is applying the film correctly.
Steps:
- Explanation: Taking good care at this stage ensures that the PPF lasts long while still being effective.
Recommendations:
- Avoid Washing: During the first 48 hours following installation; don’t wash your vehicle so as to give ample time for bonding between paintwork protection film (PPF) and car surface.
- Inspect for Bubbles: Check if there are any air bubbles left behind; use squeegee or similar tool to get rid of them.
- Routine Maintenance: Frequently washing off dirt particles accumulated on top layers of coating materials; also inspecting appearance & condition of outermost layer(s) covering automotive finishes treated by such films should be carried out regularly too – thus preserving its look as well as protective properties intact always!
By adhering to these tips and being keen on every single detail, enthusiasts can achieve professional level installations of paint defense films thereby safeguarding their cars’ original paints beneath robust long-lasting armor.
Deciding When to Seek Professional Help
During the application of PPF, some circumstances require a professional to achieve the best results and lengthen the life of the film. These are the most important things to think about:
Complexity of Application:
- Elaboration: You may have complex curves, edges or intricate parts on your vehicle that need covering which can only be done with expertise in applying them hence necessitating professional help.
Time Constraints:
- Elaboration: If you do not have much time to plan, prepare and apply with great care then it would be better for you if professionals did it for you because this can save time and prevent mistakes.
Experience Level:
- Elaboration: Beginners or people who are not sure about their skills should get someone trained so as not make expensive errors but rather bring out a perfect finish.
Quality Assurance:
- Elaboration: Warranties given by most experts cover workmanship thereby assuring customers that they will get back value over a long period.
Therefore, although individuals can install these materials themselves when they are enthusiastic enough and have sufficient time plus ability; however seeking assistance from an expert may still be necessary where there are many complexities or difficulties involved since this ensures good performance of paint protection films while maintaining its attractiveness on car bodies.
Reference sources
Frequently Asked Questions (FAQs)
Q: What tools are necessary for installing PPF on your vehicle?
A: A heat gun, alcohol solution, squeegee, spray bottle, microfiber towels, and cutting tool are necessary to install PPF. These instruments are used to make the film stick properly and give the most protection.
Q: How can I prepare the surface before applying the film?
A: Clean the car’s paint with an alcohol solution to remove dirt, grease, and contaminants. This step is very important as it ensures good adherence without damaging the paint.
Q: What is the best way to position the film on the surface of my car?
A: Spray water mixed with alcohol solution onto where you want to put PPFFirst. This will allow ppf to slide around, making it easy to position correctly before securing it in place.
Q: How do you maximize protection when applying paint protection film?
A: Ensure that all high-impact areas, such as a hood, front bumper, side mirrors and door edges are covered by ppf. Use a heat gun at the edges while pressing them down, thus eliminating air bubbles so as to achieve maximum adhesion.
Q: What should I do to smooth the application of paint protection film?
A: Always work in a clean environment free from dust particles. Start from one side working towards another using squeegee which helps push out air bubbles and excess moisture ensuring smooth application of the film.
Q: How long does installation typically take?
A: The time taken during installation usually depends on size of vehicle and areas being covered.On average it takes about 2-5 hours for professional installations.
Q: Can I install PPF myself, or should I seek professional help?
A: Installing PPF by yourself is possible but requires lot of patience plus accuracy. For best results and maximum protection, it is advisable that you seek professionals who will ensure correct application, thus attaining the desired level of cover against any form of damage.
Q: After applying protective film, how should I maintain my car’s paint finish?
A: Clean your vehicle regularly after PPF installation using non-abrasive car shampoo and microfiber cloth. Avoid using harsh chemicals or high-pressure washers, which can affect the film. Routine maintenance protects against scratches and other damages on cars’ painted surfaces.
Q: What if bubbles appear during the installation process?
A: In case there are any noticeable air pockets under the film, use a heat gun to gently warm them around, then take a squeegee to push them outwards. Be cautious so as not to break through, but ensure good adhesion between ppf and vehicle paint work.