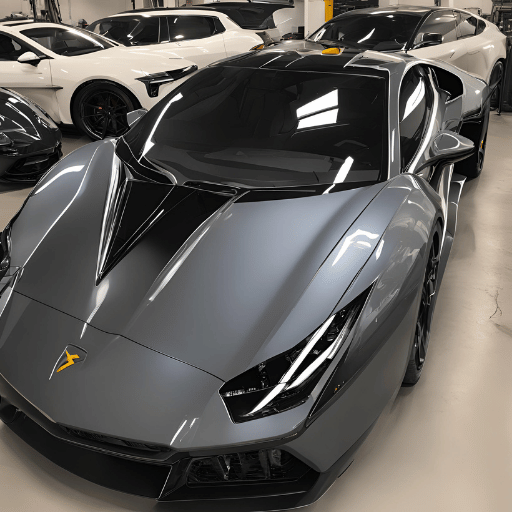
PPF is an acronym for Paint Protection Film (PPF), otherwise known as clear bra, and it is a type of thermoplastic urethane film that is installed on new or used car paints to protect them from stone chips, bug splats, and little scratches. This film, which can heal itself, guarantees that the original looks of your vehicle are preserved, thereby safeguarding your investment and upholding its aesthetic value. PPF is formulated to be highly strong and acts like a non-visible barrier, giving users an unmatched combination of clarity, toughness, and longevity. Installing paint protective film may require accuracy, patience, and the proper tools, but applying such films has now been made possible with do-it-yourself products offered in stores today, enabling those who love their cars like experts to apply the same standards themselves.
Choosing the Right PPF Kit for Your Vehicle

What to look for in quality PPF products
Several critical parameters should guide your decision on the quality of a vehicle Paint Protection Film (PPF) kit. The first and most important one is the material quality of the PPF. You should look for high-grade, thermoplastic urethane films with high elasticity that can conform to the shape of the vehicle and achieve a smooth finish. A good PPF also has excellent self-healing properties that make minor scratches and scuffs disappear when heated by sun or hot water.
Another important issue is optical clarity since it determines how invisible the protection is on your car. High-clarity films ensure that no changes in color or haziness will be noticed on the original paintwork. The thickness of the film is another significant factor; thicker films may be more difficult to apply but offer superior impact resistance. Generally, an equilibrium lies with about eight mils thick films which provide effective protection without compromising ease of installation.
Moreover, look at the adhesive used with PPF. A premium adhesive ensures film sticks to vehicles firmly but does not damage paints when removed. Find solutions where you can adjust your film during installation process, however once settled they become permanent.
The last thing to consider includes durability as well as warranty, which are vital indicators of its quality. A good PPF should be able to survive harsh weather conditions, resist yellowing and staining over time, and maintain its integrity for many years. Manufacturers who give guarantees about their products’ longevity and performance further assure you when making choices.
In summary, while selecting a PPF kit, it is necessary to have regard for material quality, self-healing properties, optical clarity, thickness, adhesive quality, durability, and warranty from manufacturers of such kits. These factors will help you choose a product that provides optimum security for your vehicle while preserving its appeal appearance-wise.
Comparing top ppf brands: Xpel, 3M, and more
In the sphere of Paint Protection Film(PPF), various brands are known for their quality, among them Xpel and 3M. In order to determine the position of these top PPF brands in the market as well as user preferences, some key parameters must be considered.
Xpel has captured an important segment of the market largely by virtue of its advanced self-healing technology. This film is designed to heal itself using heat generated from sunlight or a vehicle engine when it accumulates minor scratches or swirls. Moreover, Xpel films are also known for their remarkable transparency and ability to retain the original color of a car without changing its appearance. Its edge seal technology that minimizes occurrence of film lifting on edges and corners is one of its most significant features.
3M, which is one of the industry’s pioneers, manufactures PPFs that are highly durable and long-lasting. In addition, their films have excellent stain resistance properties hence keeping away yellowing or any other form o discoloration over time. It should be noted that 3M adhesive creates a strong bond without leaving residues after being removed, which is great for preserving the paint job on the car in the future.
Other reputable companies like SunTek, Llumar and Avery Dennison have come up with competitive propositions offering something different in return. For example, SunTek’s PPF has been praised due to its hydrophobicity, making it easier for someone to clean and maintain his/her car to look neat all day long. Besides offering both glossy and matte finishes, Llumar stands out because it provides a variety of options to choose from depending on taste preferences. Finally, Avery Dennison provides a warranty that covers it all and a lifetime against harmful weather conditions.
It is, therefore, essential to look at the following factors while comparing these brands:
- Self-healing capabilities: How well can this material recover itself from small surface damages?
- Optical clarity: The degree to which this covering affects the original car paint color when viewed through it.
- Thickness and impact resistance: Level of shield from hits vis-à-vis ease used in installing it.
- Adhesive quality: How strong is the bond between the film and the surface on which they were placed, and what can be expected to happen during removal?
- Durability and resistance to elements: What is the effectiveness of this film against weather, stains, and yellowing over time?
- Warranty and manufacturer support: The manufacturers’ commitment to how long their product will last.

Ultimately, a comprehensive analysis based on these factors will help you choose the best PPF brand that suits your needs while keeping up with your vehicle’s look. Every brand has its advantages making it important for one to identify preferred features first.
Pre-cut vs. roll PPF: Which suits your DIY project best?
When deciding whether to use pre-cut or roll paint protection film (PPF) for a DIY project, there are several important factors that come into play. Pre-cut PPF kits, on the other hand, are made specifically for certain vehicle models and, therefore, fit perfectly without requiring further trimming; this can significantly cut down on installation time and reduce the likelihood of mistakes. For people who want the simplest method possible and those whose main concern is that it should fit their car’s shape perfectly, the pre-cut option is the best.
Alternately, roll PPF may be used as it offers a versatile solution that can be customized to fit any shape and size of the vehicle. This adaptability works well in covering distinctive parts or irregular areas normally not found in pre-cut kits. However, selecting roll PPF requires more expertise since one has to measure everything manually before cutting and applying them personally. It comes with an individual approach and may be more economical if you know how to apply PPF or have many vehicles or different areas to cover.
Ultimately, whether to go for pre-cut or roll PPF depends on how skillful the installer is, specific requirements of the task at hand and level of customization needed. Thus while pre-cut kits work best for those who are concerned about ease of use and high level precision; rolls will be preferable by people looking for flexibility as well as customization in their own projects.
Detailed DIY PPF Application Process

Prep work: Cleaning and using a clay bar for a pristine surface
The vehicle’s surface should be prepared thoroughly prior to applying paint protection film (PPF). First, it’s necessary to clean the car so that it is free from every type of dirt and soil. To wash this car, one needs to apply good automotive soap, which should not contain substances that can hinder PPF from sticking.
After cleaning, you should do claying. It is during this procedure of laying that one can get rid of invisible impurities by washing them away. This clay bar is gently rubbed over a wet surface of the automobile picking up minute particles thereon. In fact, this ensures that the exterior finishes on your car are at their best while smoothening adds value to great adhesion for PPF.
To sum up, initial preparation involving thorough cleaning and careful claying makes a difference in successful PPF application. As such, this step acts as a foundation for proper film adherence making it long-lasting as well as providing an immaculate finish.
How to apply paint protection film without bubbles or wrinkles
Applying Paint Protection Film (PPF) perfectly entails paying acute attention to details and following the best practices. The presence of air bubbles or wrinkles not only reduces the beauty of your vehicle but might as well compromise its protective ability. Below are steps based on industry experience that guide application processes without any blemish:
- Controlled Environment: Ensure that there is no dust in the area where the film is applied and that the temperature remains steady. Extreme heat or cold can affect the film’s flexibility and adhesive properties. It is expected that one operates within a controlled environment with temperatures ranging from 50-90°F (10-32°C).
- Right Solution Mix: Use a slipping solution made out of water mixed with few drops of baby shampoo or recommended soap by manufacturer. The correct ratio helps in positioning the film more easily and prevents premature adhesion during application.
- Squeegee Technique: Apply firm, flexible squeegee while using overlapping strokes starting from the center to push out air and liquid trapped beneath film cautiously. Squeegee choice, as well as its flexibility and sharpness of edges are crucial in eliminating potential wrinkles and bubbles.
- Film Stretching: Gently stretch the film over curves and corners when necessary. However, avoid excessive stretching because it causes distortion and reduced sticking power. Modest heating of film through an application of heat gun may make it more pliable but this should be done sparingly so as to prevent contraction or distortion.
- Edge Alignment & Trimming: Before final application, ensure that you precisely aligning the film at its edges. Use an extremely sharp blade to remove unnecessary material in such a way it fits correctly to the vehicle’s shape. A clean cut prevents peeling as well as lifting which may result in presence of air between layers.
- Post-Application Inspection & Corrections: After applying, inspect very carefully for tiny bubbles on the film surface. Consequently, use a fine needle to puncture them or warm small areas using a heat gun. This allows trapped air to expand and escape through the edges.
- Curing Time: Let the film cure fully on a vehicle’s surface. During this period, one should not wash or wax his/her car that normally takes between 24-72 hours but can be influenced by weather variations.
Following these steps will enable both professionals and Do-It-Yourself (DIY) enthusiasts to achieve better results in PPF applications, thus obtaining a smooth and wrinkle-free finish that lasts forever.
Tips on trimming and fitting PPF to complex vehicle curves
To fit paint protection film (PPF) into intricate vehicle curves, it takes a blend of precision, care, and the right techniques. Here are some tips from experts that can be used to address this challenging aspect of the PPF application:
- If There Is One: Always use pre-cut templates that match with the car make and model where available. This ensures accurate fitting and reduces the need for extensive trimming.
- Relief Cuts: When manually cutting materials, make small relief cuts around the more complex curves and corners. This allows for easy relaxing of the film material on such contours; hence, there is no risk of creating creases.
- Custom Fit: If you are dealing with very complicated areas, consider making your own template. Place the film over the area slowly warm it up then cut using a sharp blade taking care not to go deep into the vehicle’s paint coat.
- Squeegee Techniques: While smoothing over curved sections, get soft squeegee; work slowly away from middle section. The film may be stretched by applying slight heat so that it fits well on its shape.
- Heat Application: Appropriate application of heat is crucial when dealing with PPF in curves. A heat gun will help in making film flexible thereby stretching without tearing it.When excessive heating occurs , integrity and adhesion of this film becomes compromised.
- Overlapping Sections: Use smaller portions of overlapping films in order to wrap around difficult bends where there is no space for wrinkles. Align each part correctly as well as smoothen out every curve to maintain aesthetics and protectiveness attached to PPF.
- Patience and Practice: It will take you time and practice before you become a professional who knows how to apply PPF on vehicles with complex curves.Going through each step carefully is important since rushing may lead to mistakes thereby giving an unprofessional finish that does not look smooth at all.
With these suggestions, experts or people who like doing things themselves about automobiles could advance their abilities to use PPF on cars without compromising on quality, even where surfaces are a major challenge.
Maintenance and Care of Your PPF Wrap


Regular cleaning and care tips to keep your ppf wrap pristine
Maintaining the originality of your Paint Protection Film (PPF) wrap is not only extending its life span but also keeping the aesthetic appeal of your car. Below are some expert tips on how to clean and care for it regularly:
- Treat It Tenderly: Utilize a little water and a light, auto-specific shampoo to wash dirt away gently. Avoid scratching the film by using a soft microfiber washing mitt.
- Wash Frequently: To avoid dust particles settling on it that can scratch it in the future, rinse often with clean water during washing.
- Stay Away from Harsh Chemicals: Do not use cleaning solutions containing harsh chemicals, dyes, or fragrances because they can disfigure the film or leave residues.
- Be Careful when Drying: Silicone squeegee or soft microfiber cloth should be used to dry the vehicle after washing. Any rough rubbing or aggressive wiping would undermine the integrity of the film.
- Remove Spots Immediately: Spot clean bird droppings, sap, or tar with an alcohol based cleaner specially made for PPF. Allow cleaner to sit for a while before wiping gently.
- Prevent Stains: Vinegar solution diluted with water should be soaked on stains caused by water marks or mineral deposits before rinsing and drying them. This prevents etching or permanent marks from occurring.
- Professional Inspections: Appoint regular inspections with professional installers so that any problem, such as bubbling up or lifting edges, can be addressed when it comes to PPF conditionality.
These maintenance suggestions will keep your PPF wrap in good shape; thus help protect your investment and keep your vehicle looking nice.
When and how to use ceramic coatings on top of PPF
Ceramic coatings can also be added on top of Paint Protection Film (PPF) to boost the car’s exterior safety. The best time for applying ceramic coating is when the PPF has finished curing, usually about 7-14 days after installation. This waiting period ensures that the film has bonded properly to the vehicle’s surface without hindrance from the application of ceramic coating.
- Surface Preparation: Make sure PPF is free of dirt and other substances.It is very important to do a thorough wash followed by clay bar treatment, if need be in order to remove any dirt or other contaminants on the paint surface which may interfere with the bondability between ceramic coating and paint.
- Product Selection: Choose a ceramic coating that is designed specifically for use with PPF. These formulations are specially formulated for this purpose as they take into account the unique surface characteristics of the film and provide excellent adhesion and performance.
- Application: Apply your ceramic coating uniformly over surfaces covered by PPF according to product instructions. A controlled application requires the use of a microfiber pad applicator. Sufficient coverage must be achieved while avoiding areas where too much material is applied, leading to streaks or hazing.
- Curing Time: Observe the recommended curing time by the manufacturer of the protective product. While it cures, keep dust away from drying coated vehicles in a dry place. Initial cure times vary, but at least 24 hours are generally needed for full curing. Whenever it is necessary to ensure proper bonding and curing, no contact should occur between water /contaminants during this time frame.
By putting a ceramic coat over PPF, you create two physical layers that enhance scratch/impact resistance while making it easier to clean due hydrophobic properties which keeps your car looking nice for longer duration. For proper selection of products and techniques during application, it would be advisable to consult professionals
How to Install PPF on Specific Vehicle Areas

Installing PPF on high-impact zones: Hood, front bumper, and rocker panels
It is important to install Paint Protection Film (PPF) on high-impact areas like the hood, front bumper, and rocker panels so as to protect them from stone chips, road debris, and scratches. There are several tasks that make up this installation procedure:
- Preparation: Thoroughly clean and decontaminate the surface area. Ensure that there is no dirt, wax or sealants left on them in order to allow PPF to adhere well.
- Cutting and Shaping: A precision cutting tool should be used for each section of the vehicle so as to ensure a perfect fit of the PPF in those areas where they are intended. Do not forget edges and curves since they need to match perfectly.
- Application Solution: Prepare a slip solution to help with positioning of the film. This is done by making it easy for one to move it before sticking it onto the car’s surface.
- Squeegee Technique: Once the film is positioned, use a squeegee starting at its center working towards its edges slowly pushing out application solution from beneath. Consequently, air bubbles go away while fully adhering it on vehicle’s surface.
- Edge Sealing: After fitting film all around the vehicle, make sure that you seal along any edge possible so that it does not peel off prematurely, thereby lasting longer.
- Inspection and Finishing: Look out for any imperfections, bubbles, or misalignments after the installation has been completed. Heat guns may be used selectively in such cases whereby films are conformed along complex curves plus edges thus improving their strength as well as appearance.
Following these steps will help maintain your car’s aesthetic appeal and resale value by effectively protecting high-impact zones on a vehicle against common damages. For accurate application purposes, professional installation is recommended for optimal results due to the technical skills required for precise applications.
Techniques for wrapping edges and tricky areas like headlights and mirrors
Wrapping the edges and maneuvering in such areas as headlights and mirrors necessitate great attention to detail and expertise. It is, therefore, necessary to employ a mix of precision and skill for a flawless wrap.
- Heat Application: Use a heat gun to warm the Paint Protection Film (PPF) gently thereby making it very flexible. With this method, it is possible to stretch the film around intricate shapes and curves without compromising its integrity.
- Triangulation Method: Triangulation technique is vital when dealing with corners and edges. Pressure created on the film at chosen points towards an edge or corner leads to smooth application that is wrinkle-free. This involves pulling away from the area in which you want apply in a triangular shape to avoid creasing or gathering.
- Relief Cuts: Making relief cuts across the film aids easy application round curved edges or tight spots significantly reduce time for applying film in such areas as curves around headlamp where there may be multiple curves. However, these cuts should not be made directly into wear areas because they will decrease its intended purpose thus, reducing its endurance under water contact situations.
- Squeegee Angles and Pressure: Change in squeegee angle as well as pressure can help prevent trapping air bubbles or moisture under any applied film on windows (Jenny 3). An angle of 45 degrees is preferable for pushing out bubbles while ensuring total seal along all the edges of window films.
- Post-Installation Heat Treatment: Heating over heat gun with tucking tools helps bond these unwanted films at difficult places like contour regions over their respective protruding structures after being applied with micro squeegee or tucking tool.
- Edge Sealing Technique: Application of an edge sealing solution might assist with lifting prone areas by adding another adhesive layer against water entry and debris accumulation.
By observing these steps accurately, one can obtain perfect results particularly on those sections that are complicated like those found on mirrors a highlight hence ensuring long life span and effectiveness of PPF. It is therefore recommended that an expert should undertake these activities.
Applying ppf to protect your vehicle’s door edges and rails
In order to prevent scratches, chips, and environmental damage from harming your vehicle door edges and rails, Paint Protection Film (PPF) must be applied with utmost care. Start by cleaning the surface of the focus to remove any contaminants. Measure and cut the PPF so that it fits accurately with minimum overlapping. A flexible squeegee is important in this process of fixing film on door edges and rails as it is able to work better even in the narrowest areas where there are curves. It is essential to have a perfect bonding without any air pockets or misalignments because these regions endure much wear and tear. A tack solution can be used to make film applications more manageable. Lastly, the film should undergo a post-installation heat treatment that enables it to conform to the complex shapes of door edges and handholds by sealing tightly around all its corners for better protection throughout its life span. In conclusion, this method provides good defense against abrasion in these delicate locations, hence keeping vehicles’ attractive appearances and resale values intact at all times.
Removing and Replacing DIY Paint Protection Film

Signs it’s time to remove and replace your vehicle’s ppf
It is imperative to know the right time to remove or replace Paint Protection Film (PPF) on your car in order to maintain its aesthetics as well as protective qualities. Some of them include:
- Discoloration or Yellowing: As time goes by, it becomes exposed to the sun and other environmental pollutants that may cause discoloration and yellowing hence significantly reducing its clarity and effectiveness.
- Peeling of the Edges: Once the film starts peeling off from its edges, dirt and moisture can easily get between it and the car body leading to decreased adhesion and protection.
- Scratches and Tears: Though PPF is designed so that it does not scratch or tear easily under impact, serious damage can puncture it, calling for a fresh one before its ability to protect lapses.
- Loss of Hydrophobic Properties: When water stops being repelled by the film effectively, this is an indication that the topmost coating has weathered-off hence requires replacement for protection restoration.
Replacing PPF at this point ensures that your vehicle remains safeguarded against scratches, nicks, impacts of nature thus maintaining its look as well as value.
Step-by-step guide to removing old ppf without damaging your car’s paint
The process of removing Paint Protection Film (PPF) requires care and attention to avoid spoiling the underlying vehicle paint. A professional and effective approach to PPF removal can be summarized using the following stages:
- Heat Application: Start by softly heating the PPF with a heat gun or hair dryer. The heat loosens the adhesive, making it possible to peel off the film. Keep moving the heat source so that no area is overheated.
- Corner Lift: Choose an edge or corner of the PPF from where to begin. Pick up the corner carefully either with your fingers or a plastic razor blade. In case you require a plastic tool, make sure that it is soft enough not to scratch paint.
- Slow Peel: Gradually pull away at 45 degrees angle from where film has been glued onto from surface of car bodywork. This adhesive softness can be maintained by applying heat as you go thus less likelyhood of damaging paint works. To prevent tearing of film, ensure that peeling is done slowly but evenly.
- Adhesive Removal: Once all these films are removed there might be some adhesive left behind on car surface. Apply automotive adhesive remover as directed by its manufacturer’s guidelines if necessary. Wipe gently with microfiber cloth.
- Cleaning: After having all adhesives removed, clean this region with mild soap solution and water. Let dry completely using clean microfiber towel in order to avoid water spots.
- Inspection and Touch-Up: Inspect for any damage signs or residue left after removal of PPF in that spot. In case required use gentle polish for restoring shine on it.
By meticulously following these steps, one can safely remove old PPF, preserving the integrity and aesthetic appeal of the car’s painting job.
DIY PPF vs. Professional Installation

Cost Comparison: Is DIY ppf worth the savings?
In fact, the fitting of Paint Protection Film (PPF) yourself can be hugely cost-effective majorly because you do not have to pay a professional fee which constitutes a significant component of the total cost. However, this financial advantage must be weighed against some critical issues. To start with, the application quality may vary so much; experience and accuracy from expert installers considerably reduce the possibility of costly errors such as air bubbles, poor alignment, and spoiling the paintwork. Also, it is common that manufacturers’ warranties apply only when professionals fit them; therefore, DIY applications cannot gain any cover for faults or breakdowns. Finally, buying the necessary tools and preparing an appropriate working area can outweigh initial savings. Hence, while being cheaper than acquiring PPF services from others, such an effort requires high proficiency levels as well as vast amounts of care and precision, whose end results might not imitate those associated with specialized applications.
Pros and cons of DIY ppf application vs. professional services
DIY PPF Application
PROS:
- Cost Savings: The most visible advantage is the significant reduction in costs, mainly by avoiding professional labor charges.
- Personal Satisfaction: Filling out the form on your own may offer a sense of achievement and vehicle owner involvement in its maintenance.
- Flexibility: DIYs have the freedom to work at their own time and convenience without getting booked for an appointment.
CONS:
- Risk of Poor Application: Because they do not have the expertise and professionalism, DIYers are at a greater risk of installation errors like air bubbles, dust contamination, and misalignment.
- Zero Warranty: Many PPF producers only warrant films fixed by certified professionals, thus leaving out those that are done by themselves.
- Equipment Costs: Start-up expenses for top-quality tools for installation and a good working area can be high.
Professional PPF Services
PROS:
- Expertise and Experience: Professionals possess the skill and knowledge to ensure flawless application, minimizing the risk of installation errors.
- Warranty Coverage: Professional installations are often backed up with a manufacturer’s warranty for peace of mind against any kind of fault or damage.
- Time-Saving: Outsourcing this task saves personal time and effort, with most installations completed within a day period
CONS:
- Higher Costs: The major drawback is that it comes at a much higher cost due to labor charges mostly.
- Scheduling: Customers may wait until booking dates depending ion the service provider, thereby delaying the protection of one’s car
In conclusion, while giving cost savings, a hands-on approach, as well as other risks related to mistakes, lack assurance. Notwithstanding their higher expense compared to DIY applications, professional services provide expertise, quickness, plus warranty guarantees that protect you from any flaws that would ruin your finish.
When to consider a pro installer for your paint protection needs
There are a number of reasons why it is advisable to hire an installation specialist to install paint protection film (PPF). Firstly, if your vehicle has great sentimental or monetary value, the professional application will ensure that the aesthetics and protection of the car are at their best without endangering it. Secondly, precision and expertise may be required due to the complexity of contours in your vehicle; thus, only an experienced installer would be able to supply that guaranteeing smooth fitting. Thirdly, professional services come in handy if you don’t have the tools, environment, or confidence needed to apply film yourself, as they can help minimize costly mistakes. Lastly, warranties given by professionals are not usually offered for DIY installations which means that your investment is safe. Opting for a professional installer is a strategic decision to maintain the highest quality of protection and aesthetic appeal for your vehicle.
Reference sources
- Source: Car and Driver Magazine
- Summary: There is an in-depth article in Car and Driver Magazine that explains the benefits and application techniques of paint protection films for do-it-yourself use on vehicles. The magazine gives practical insights into how to choose, install, and maintain these films for effective protection of a car’ body. This resource is valuable to automotive fans who want their cars to last for long and look better with a bit of expert advice on protecting an automobile’s paint like a professional.
- Source: Journal of Coatings Technology
- Summary: A journal article from the field of coatings technology examines DIY paint protection film science and its use on different kinds of automobiles. It discusses various types of protective films, with regard to their useful life and resistance to environmental factors. The source provided technical details as well as performance evaluative comments so that readers have complete understanding about DIY Paint Protection.
- Source: Manufacturer Website – XPEL
- Summary: On XPEL’s official website, there is a full guidebook containing information about Do-It-Yourself (DIY) Paint Protection Films focusing on quality, durability, and ease of installation, among others. It includes product comparisons, video tutorials and step by step guidebooks essential in assisting consumers selects the appropriate film for their vehicle. The site emphasizes empowering users to protect their rides with professional-grade solutions, thereby serving as a trusted source for premium paint protection options sought by DIY lovers.
Frequently Asked Questions (FAQs)

Q: What is DIY Paint Protection Film, and why should I consider it for my car?
A: What’s more, DIY Paint Protection Film (PPF) is a top-notch polyurethane film that you can put on your car’s body to prevent scratches, chips, debris, and even minor abrasions. Besides being affordable and lasting, this option will help keep your car looking new. PPF enthusiasts choose it to safeguard their vehicles from stones, gravel, and other common road hazards. Why not go the PPF way, which lets you have a barrier around your car while saving money that could be used alongside precious time in maintaining your vehicle in good condition?
Q: Can I apply PPF film to any vehicle, and are there specific areas I should focus on?
A: Yeah indeed PPF film can be applied onto any make of a car including brand names like Tesla Model S, Porsche etc. For instance, front end fenders hood are high impact zones – parts of the automobile most prone to abrasive particles like gravel or stones that could lead to scars left on glassy surface of the paintwork. Precut kits ensure ease and accuracy while protecting every key area of the vehicle.
Q: What tools and preparations are necessary before applying PPF to my car?
A: Proper preparation and the right tools are essential for the successful application of PPF. You’d need a clean, dust-free environment; preferably in the garage, where airborne contaminants would be avoided, together with basic tools such as a squeegee, high-quality spray bottle, and utility knife for trimming microfiber towels as an application preventative measure against scratching, among others & slip solution( usually baby shampoo mixed with water) used to aid in setting the film thereby making it easily positioned. Also, prior to applying pppf, it’s critical that one ensures their cars are washed thoroughly dried up without having any wax or sealant
Q: Are there different types of PPF, and how do I choose the right one for my car?
A: Yes, different types of PPF are available ranging from regular clear bras to more advanced self-healing and ceramic coated films. The type you select will depend on your budget, the level of protection required and whether you want a glossy or matte finish. Especially good for minor scratches and scuffs, top quality self-healing films ensure that your car still looks beautiful with less effort involved.
Q: Can DIY PPF application go wrong, and how can I ensure a successful application?
A: However, it is not easy as it requires someone to be patient enough as well as having time plus giving extra effort. Common problems comprise air bubbles, misalignment, and non-adherence, mostly caused by poor surface preparation or improper handling. By adhering strictly to instructions given while using high-quality PPF; ensuring that the car is perfectly clean & applying within a controlled environment could greatly enhance your chances of success. Finally, watching tutorial videos on YouTube and reading through the product description thoroughly before starting can also provide valuable tips/tricks
Q: How long does it take for paint protection film to last, and does it require special care?
A: Depending on climatic changes, maintenance and the kind of film installed, top-notch PPF may last for about five to ten years. A slight washing and avoiding harsh cleansing products is all that is required to keep it in good shape. It can be cleaned or wiped with a soft microfiber towel to help maintain its clarity as well as protectiveness. Some films come with warranties that give additional guarantees of quality.
Q: Where could I get PPF kits and tutorials for self-installation?
A: You can buy PPF kits and guides online from stores specializing in car accessories as well as protective films. Many manufacturers provide pre-cut kits that are designed for individual car models making the entire process much easier. In order to find step-by-step instructions on how to do this yourself video tutorials available online are very informative especially those found on YouTube, they usually include practical tips too which can be helpful for amateurs like me who want more information about it. Additionally, reading the comments or joining the discussions will give you more ideas or even recommendations from people who have already done this before.
Q: Is There a Temporary Method of Protecting My Vehicle’s Paintwork without Installing Permanent PPF?
A: Yes, TRACWRAP is an option if you need temporary protection. This is a flexible alternative that can easily be put on or pulled off when needed during short-time usage, like on road trips or occasions where your vehicle might be at greater risk. Tracwrap works just as well against scratches, rock chips, and debris but won’t leave any marks after being removed, thus making it an alternative solution particularly suited for individuals who don’t want permanent ppf but still need some sort of protection while driving their cars around town.